


As the Dusun gateway is running based on the Linux system, how to implement an application over Bluez stack to ‘talk’ with BLE 5 devices on Dusun gateways will be presented here.
Bluetooth Low Energy (BLE) is intended to provide considerably reduced power consumption and cost while maintaining a similar communication range with Bluetooth. BLE is suitable for IoT applications. Many operating systems support BLE and thus BLE is very popular. The Dusun IoT gateways support most connectivity protocols including BLE(4.x/5.0/Mesh), ZigBee 1.2/3.0, Z-Wave, TCP/UDP, etc. Users can connect the Bluetooth smart gateway with various BLE devices. As the Dusun gateway is running based on the Linux system, how to implement an application over Bluez stack to ‘talk’ with BLE devices on Dusun gateways will be presented here.
1. Product Feature Summary
System:
- OS: Linux@ OpenWrt
- Processor: MTK7620A (MIPS24KEc(580MHZ))
- RAM: 128MB
- Flash: 64MB
Wireless protocol:
- LTE-M1
- Bluetooth Low Energy
- Wi-Fi
- Zigbee3.0
- Z-Wave
Ethernet:
- WLAN
- LAN
2. System block diagram

Dusun’s gateways run the Linux OpenWrt system. As depicted in figure 1, Linux supports BLE protocol through running the Bluez stack. BlueZ provides support for the core Bluetooth layers and protocols. It is flexible, efficient and uses a modular implementation. The BlueZ stack supports all core Bluetooth protocols and layers now. Users can write BLE applications using Bluez APIs to manipulate BLE 5 devices.
3.System Configuration
The Dusun gateways are configured through a web service which means the gateways should be connected with a computer first. The Dusun gateway can be connected through wired connection and WIFI connection.
3.1 Gateway connection
Wired connection
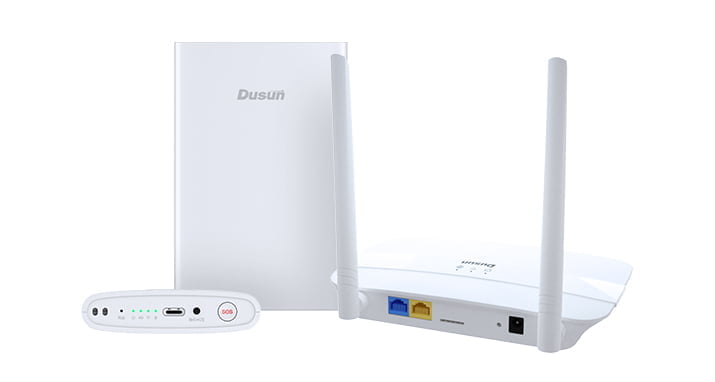
The two RJ45 ports gateway includes a WLAN port and a LAN ports. The wired connection of this type gateway is shown below figure 2-A. Users can use the gateway default LAN IP address: 192.168.66.1 to connect it.

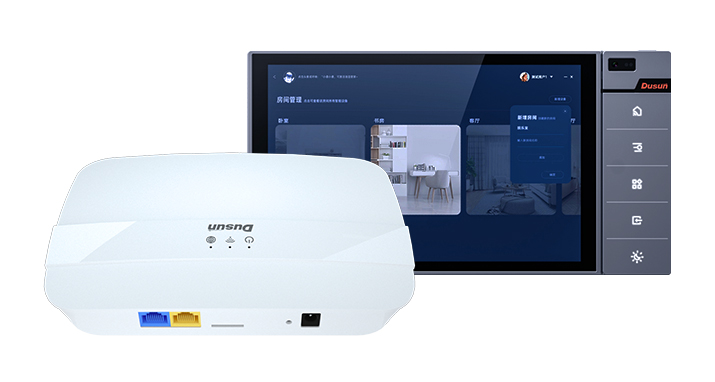
The one RJ45 port gateway includes a WLAN port only. The wired connection of this type gateway is shown in Figure 2-B. A router is used to ensure the gateway and the PC are in the same local area network. Users should log into the router to check the gateway’s IP address for connecting it.

After the above physical connection is completed, please open a web browser on PC, Input Gateway IP Address;Enter the username and Password(default Username: root Password: root),login to the gateway.

WIFI connection
The Dusun gateway supports WIFI connection to login it, but WIFI is not enabled default. The WIFI should be enabled first if user want to use WIFI to connect a gateway. Users should login the gateway through the above wired connection to enable the WIFI module. After the connection is established, please follow the below steps to enable WIFI:
- Login to the gateway (see above figure);
- Select Dusun > Wifi Manage.

3. Enable Device Radio0 and configure Wifi Interface Wlan0(Wifi Mode:ap, Wifi SSID: Input your own; WIFI Encryption: PSK2 or others; WIFI key: your password)

4. Click the Save & Apply button, and waiting the changes to be applied.


3.2 Gateway configuration
After the connection between the gateway and computer is established, the gateway can be configured following these steps:
- Open a web browser on PC, input the gateway IP address, enter the username and Password (default username: root password: root),login to the gateway;
- Make system configuration at the system menu, the timezone, password and others can be revised here.


4. Configure other settings according to users’ needs.
When the configuration is completed please reboot the gateway. Then users can login to the gateway by inputting the following ssh commands in a terminal, and then input your password. IP_addr is the IP addr which user configured above. The default IP is 192.168.66.1. The below figure shows the login scene.
ssh root@IP_addr

4. API for BLE5 software development
/*Enhance the security of a connection to current security requirements*/

cmd_sm_increase_security

/* set the default Bluetooth connection parameters*/

cmd_le_gap_set_conn_timing_parameters

/* connect an advertising device with the specified initiating PHY*/

cmd_le_gap_connect

/*enable or disable the notifications and indications being sent from a remote GATT server*/

cmd_gatt_set_characteristic_notification

/*write the value of a characteristic in a remote GATT database*/

cmd_gatt_write_characteristic_value

/*start a software timer*/

cmd_hardware_set_soft_timer

/*end a current GAP procedure*/

cmd_le_gap_end_procedure

/*start the GAP discovery procedure to scan for advertising devices on the specified scanning PHY, that is to perform a device discovery*/

cmd_le_gap_start_discovery

As for other function required, please check about the ble5 api file.
5. A sample program: read data from an oximeter BLE sensor
int main(int argc, char* argv[])

{

  struct gecko_cmd_packet* evt;

  pthread_t tid1;


  /* Initialize BGLIB with our output function for sending messages. */

  BGLIB_INITIALIZE_NONBLOCK(on_message_send, uartRx, uartRxPeek);


  /* Initialise serial communication as non-blocking. */

  if (appSerialPortInit(100) < 0) {

    printf("Non-blocking serial port init failure\n");

    exit(EXIT_FAILURE);

  }

  if (pthread_create(&tid1, NULL, (void*)bootdaemon, "new thread:") != 0) {

        printf("pthread_create error.");

        exit(EXIT_FAILURE);

    }

  pthread_detach(tid1);


  // Flush std output

  fflush(stdout);


  DEBUG_INFO("Starting up...\n");

  DEBUG_INFO("Resetting NCP target...\n");


  /* Reset NCP to ensure it gets into a defined state.

   * Once the chip successfully boots, gecko_evt_system_boot_id event should be received. */

  gecko_cmd_system_reset(0);

  // Flush std output

  fflush(stdout);

  usleep(10000);

  while (1) {

    /* Check for stack event. */

    evt = gecko_peek_event();

    /* Run application and event handler. */

    appHandleEvents(evt);

  }


  return -1;

}
					switch (BGLIB_MSG_ID(evt->header)) {

    case gecko_evt_system_boot_id:


      gecko_cmd_gatt_set_max_mtu(250);

      appBooted = true;

      DEBUG_SUCCESS("System booted.");


     if ( CONF_get()->remote_address_set ) {

        DEBUG_INFO("Connecting devices.\n ");

        gecko_cmd_hardware_set_soft_timer(SW_TIMER_20_MS, EVT_CONNECT, 1);

      } else {


        struct gecko_msg_le_gap_set_discovery_timing_rsp_t * rsp_t;


        rsp_t=gecko_cmd_le_gap_set_discovery_timing(le_gap_phy_1m, 40, 32);


        if (rsp_t->result) {

            ERROR_EXIT("Error, setting scanning parameters failed,%x", rsp_t->result);

        }


        printf("Scanning for devices %x.\n", rsp_t->result);

        gecko_cmd_hardware_set_soft_timer(SW_TIMER_100_MS, EVT_SCANNING, 0);

        gecko_cmd_le_gap_start_discovery(le_gap_phy_1m, le_gap_discover_generic);

      }


      break;


    case gecko_evt_le_connection_closed_id:

      DEBUG_SUCCESS("Connection closed.\n");


      oximeter_found(false);

      /* Restart general advertising and re-enable connections after disconnection. */

      gecko_cmd_le_gap_start_advertising(0, le_gap_general_discoverable, le_gap_connectable_scannable);

      gecko_cmd_le_gap_end_procedure();

      gecko_cmd_hardware_set_soft_timer(SW_TIMER_100_MS, EVT_SCANNING, 0);

      gecko_cmd_le_gap_start_discovery(le_gap_phy_1m, le_gap_discover_generic);

      break;


    case gecko_evt_le_connection_opened_id:

      DEBUG_SUCCESS("Connection Success.\n");

      gecko_cmd_gatt_discover_primary_services(ble_connection);

      //gecko_cmd_gatt_discover_characteristics(ble_connection,0x0B0011);

      //enable_notifitacion(CONF_get()->audio_data_notification);

      break;

    case gecko_evt_gatt_service_id:

      set_action(act_check_service);

      DEBUG_INFO("service.%d-%d-",evt->data.evt_gatt_service.connection,evt->data.evt_gatt_service.service);

      print_data(evt->data.evt_gatt_service.uuid.data, evt->data.evt_gatt_service.uuid.len);printf("\n");

      if(is_oximeter_dataservice(evt->data.evt_gatt_service.uuid.data,evt->data.evt_gatt_service.uuid.len))

        {

            service_handle = evt->data.evt_gatt_service.service;

            DEBUG_SUCCESS("find service:%d",service_handle);

            //gecko_cmd_gatt_discover_characteristics(ble_connection,0x0B0011);

        }

      break;

    case gecko_evt_gatt_characteristic_id:

       //struct gecko_msg_gatt_characteristic_evt_t * cha_t;


       DEBUG_INFO("character %d- %d- ",evt->data.evt_gatt_characteristic.connection,evt->data.evt_gatt_characteristic.characteristic);

       print_data(evt->data.evt_gatt_characteristic.uuid.data, evt->data.evt_gatt_characteristic.uuid.len);printf("\n");

       if(is_oximeter_rxcharservice(evt->data.evt_gatt_characteristic.uuid.data,evt->data.evt_gatt_characteristic.uuid.len))

        {

            rxcharservice_handle = evt->data.evt_gatt_characteristic.characteristic;

            DEBUG_SUCCESS("find service:%d",rxcharservice_handle);

            //gecko_cmd_gatt_discover_characteristics(ble_connection,0x0B0011);

        }

       //fflush(stdout);

       break;

    case gecko_evt_gatt_procedure_completed_id:

      process_procedure_complete_event(evt);

      break;


    case gecko_evt_gatt_characteristic_value_id:

    {

      if (evt->data.evt_gatt_characteristic_value.characteristic == rxcharservice_handle ) {

           print_notifydata(evt->data.evt_gatt_characteristic_value.value.data, evt->data.evt_gatt_characteristic_value.value.len);


      }

    }

    break;

    case gecko_evt_le_gap_scan_response_id:

      SCAN_Process_scan_response(evt);

      break;

    case gecko_evt_hardware_soft_timer_id:

      sw_timer_event_handler(evt);

      break;

    default:

      break;

  }
With different events reported to this function, it would invoke different functions. For example, if the program get a event with event id gecko_evt_le_gap_scan_response_id, it would call the SCAN_Process_scan_response function and start the scanning process.
For the complete code, you can find it in the attached file named BLE5_oximeter.
If you would prefer the code with uploading data to mqtt broker function, you can view the code BLE5withpaho.
1) Get the Openwork toolchain and copy it to a Linux PC.
Get the cross compile OpenWrt-Toolchain from Dusun, whose name is openwrt-sdk-ramips-mt7620_gcc-4.8-linaro_uClibc-0.9.33.2. Linux-x86_64.tar.bz2. Decompress the downloaded OpenWrt Toolchain to a local folder (E.g.: home/bc/ OpenWrt-SDKCHAOSCALMER).
2) Compiled the attached code files.
Copy the above code file to the Linux PC and decompress it to a folder (E.g.: home/bc/BLE5). Open ./BLE5 folder, and edit the makefile file to revise the CROSSTOOLDIR to the OpenWrt toolchain directory you created above. This is depicted in Figure 3.

Then open a terminal on the Linux PC, and type the following commands:
cd BLE5_oximeter ;
make
Finally, the test bin file which can be run in the gateway has been compiled. (Figure 4).

3) Copy the compiled test bin file into the gateway and run it.
There are several ways to do it, one of them is introduced below. Under Linux PC, you can use SCP command (scp local_file remote_username @remote_ip:remote_folder) to do it. Make sure the gateway is connected to the same router with PC, then run the following commands:
scp test root@192.168.0.115:/root

Then remote login to the gateway using SSH commands or SSH client (windows: putty or SecureCrt) and run the copied bin file. The login password can be revised following the configuration steps in the above sections. Finally, we power up the oximeter device and run the test file, we can see the data the oximeter notified to the program as the figure 5 shows. The data can be analyzed according to its manual. Figure 6/7 show the sensor and gateway for testing respectively.


Download the Attached File