1. Zigbee Temperature & Humidity Sensor Product Description
1.1. Purpose and Description
The Roombanker Temperature and Humidity sensor is a sensor designed to monitor and detect changes in environmental conditions such as temperature and humidity in indoor settings like homes, banks, hotels, and offices. It displays current readings and can transmit this data to a gateway using the wireless Zigbee 3.0. The gateway then sends these environmental signals to your cell phone, enabling real-time monitoring.
1.2. Product Feature Summary
Highly sensitive sensor
Easy to Install and Set up
Stay Connected 24*7
Low battery indication function
Temperature compensation function
Temperature, Humidity, Power, Signal Strength real-time HD display
2. Zigbee Temperature & Humidity Sensor Mechanical Requirement
2.1. Drawing
2.2. Interface
3. Zigbee Temperature & Humidity Sensor Specification
3.1. Technical Specification
Item
Parameter
Protocol
Zigbee 3.0
Working Voltage
DC 3V (Two AAA Battery)
Working Temperature
‒10°C to +55°C
Storage Temperature
‒25°C to +55°C
Low Voltage Alarm Values
2.3V±0.1V
Working Current
≤30mA
Standby Current
≤30uA
Temperature Tolerance
0.5°C
Humidity Tolerance
5%
Installation
Wall Mounting or Flat
Battery Life
More than one year (20 times per day)
Dimension
Ø61.2 x 23mm
Zigbee Performance
●TX Power: 10 dBm ●Range: 80 meters maximum, open filed Receiving Sensibility:-94dBm ●Frequency offset: +/-20KHZ ●Frequency Range (MHz):2401.0~2483.5 Low Frequency (MHz):2400 ●High Frequency (MHz):2483.5 ●E.i.r.p (Equivalent Isotopically Radiated power) (mW)<100mW Bandwidth (MHz):5MHz ●Modulation: OQPSK
4. Zigbee Temperature & Humidity Sensor Onboarding
Step One: Power on
Step Two: Press the reset button for 5s and release, the indicator light will begin to flash
5. Zigbee Temperature & Humidity Sensor Installation
Installation Method1: Stick the product in the chosen position with 3M adhesive.
Installation Method2: Place the product on the stand
1. Zigbee Smoke Sensor Product Description 1.1. Purpose and Description The Zigbee Smoke Sensor, is easily installed on a wall or ceiling, enabling you to
1. Zigbee Temperature & Humidity Sensor Product Description 1.1. Purpose and Description The Roombanker Temperature and Humidity sensor is a sensor designed to monitor and
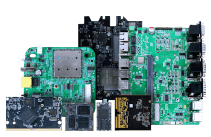
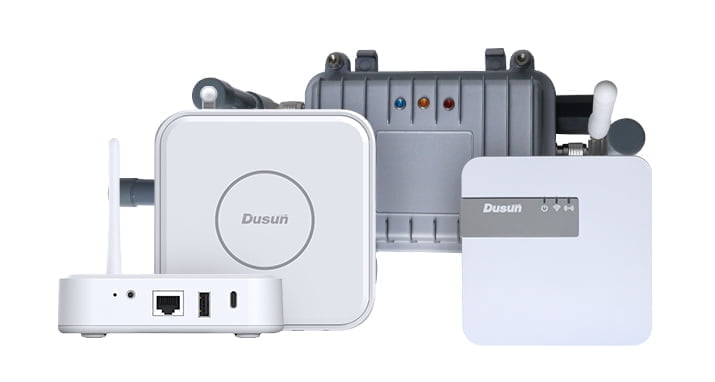
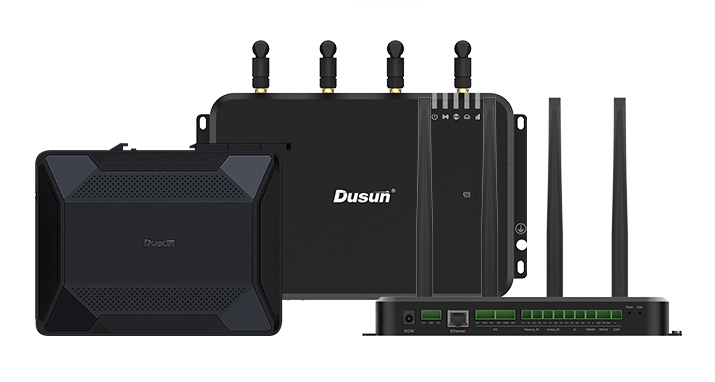
The DSGW-090-Caregiving gateway, featuring an MTK7628 CPU and OpenWrt support, is tailored for healthcare. With an RJ45 serial port and BLE compatibility, it connects seamlessly
November 12, 2024
Looking For An IoT Device Supplier For Your Projects?
We use cookies on our website to give you the most relevant experience by remembering your preferences and repeat visits. By clicking “Accept”, you consent to the use of ALL the cookies.
This website uses cookies to improve your experience while you navigate through the website. Out of these, the cookies that are categorized as necessary are stored on your browser as they are essential for the working of basic functionalities of the website. We also use third-party cookies that help us analyze and understand how you use this website. These cookies will be stored in your browser only with your consent. You also have the option to opt-out of these cookies. But opting out of some of these cookies may affect your browsing experience.
Necessary cookies are absolutely essential for the website to function properly. These cookies ensure basic functionalities and security features of the website, anonymously.
Cookie
Duration
Description
cookielawinfo-checkbox-analytics
11 months
This cookie is set by GDPR Cookie Consent plugin. The cookie is used to store the user consent for the cookies in the category "Analytics".
cookielawinfo-checkbox-functional
11 months
The cookie is set by GDPR cookie consent to record the user consent for the cookies in the category "Functional".
cookielawinfo-checkbox-necessary
11 months
This cookie is set by GDPR Cookie Consent plugin. The cookies is used to store the user consent for the cookies in the category "Necessary".
cookielawinfo-checkbox-others
11 months
This cookie is set by GDPR Cookie Consent plugin. The cookie is used to store the user consent for the cookies in the category "Other.
cookielawinfo-checkbox-performance
11 months
This cookie is set by GDPR Cookie Consent plugin. The cookie is used to store the user consent for the cookies in the category "Performance".
viewed_cookie_policy
11 months
The cookie is set by the GDPR Cookie Consent plugin and is used to store whether or not user has consented to the use of cookies. It does not store any personal data.
Functional cookies help to perform certain functionalities like sharing the content of the website on social media platforms, collect feedbacks, and other third-party features.
Performance cookies are used to understand and analyze the key performance indexes of the website which helps in delivering a better user experience for the visitors.
Analytical cookies are used to understand how visitors interact with the website. These cookies help provide information on metrics the number of visitors, bounce rate, traffic source, etc.
Advertisement cookies are used to provide visitors with relevant ads and marketing campaigns. These cookies track visitors across websites and collect information to provide customized ads.