MQTT Configuration & Setup on Dusun's Gateway
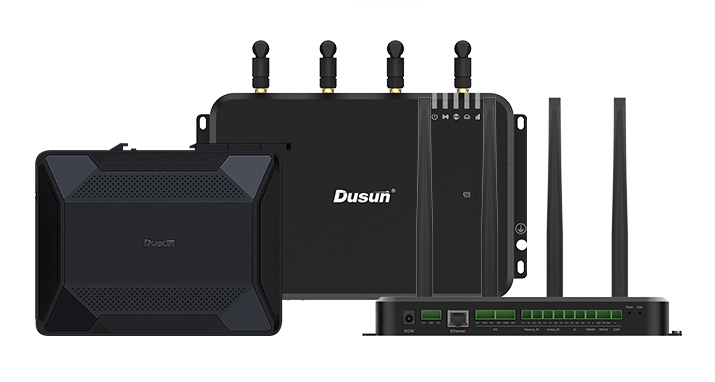
Dusun smart gateways are Linux based and programmable. Then Dusun’s gateway can use any standard protocols to transfer data into Cloud.
1. Deploy your ActiveMQ Server
Dusun IoT Gatwey Impliment MQTT 3.1
Pre-Installation
1) Requirements Hardware:
~ 60 MB of free disk space for the ActiveMQ 5.x binary distribution.
(you need additional disk space for storing persistent messages to disk)
~ 300 MB of free disk space for the ActiveMQ 5.x source or developer’s distributions.
2) Environment:
Java Runtime Environment (JRE) JRE 1.7+ (1.6 for version <=5.10.0)
(a JDK is required if you plan to recompile source code)
The JAVA_HOME environment variable must be set to the directory where the JRE is installed
(Unix: the binary “java” has to be resolvable by the PATH variable; execute “which java” to verify)
3) Installation:
download-page : https://activemq.apache.org/components/classic/download
Select the package corresponding your platfrom
unzip : tar zxvf activemq-xx-bin.tar.gz on your server directory;
Enabling the ActiveMQ Broker for MQTT
 vim [activemq_install_dir]/conf/activemq.xml
    in server section  add


    <!--  add mqtt transport -->
Starting ActiveMQ
 cd [activemq_install_dir]/bin

   ./activemq console         //foregroud

   ./activemq  start         // daemon

2. Testing the Installation
1) Using the administrative interface:
use default settings
2) Open the administrative interface
URL: http://${your_activemq_server_ip}:8161/admin/
Login: admin
Passwort: admin
also you can edit ${ACTIVEMQ_HOME}/conf/jetty.xml to specify your password and account what you want.

The topic name: according to your Dusun gateway device mac format: t/${mac};
Now gateway connected to the mqtt server , We can control the device by producing message, to the topic ,and collect data by consuming the messages from the topic.
3. Programming with Java (spring boot)
1) You'll need
JDK 1.8 or later
Gradle 4+ or Maven 3.2+
You can also import the code straight into your IDE: Spring Tool Suite (STS) IntelliJ IDE
2) Create the directory structure
In a project directory of your choosing, create the following subdirectory structure;
for example, with mkdir -p src/main/java/hello on *nix systems:
					└── src
     └── main
         └── java
             └── mqttproject
3) Build with maven
pom.xml
4.0.0
org.springframework
mqttproject
0.1.0

org.springframework.boot
spring-boot-starter-parent
2.1.6.RELEASE


1.8


org.springframework.boot
spring-boot-starter-activemq


org.apache.activemq
activemq-broker


com.fasterxml.jackson.core
jackson-databind


org.springframework.boot
spring-boot-maven-plugin
4. Configuring ActiveMQ in Spring Boot
Following is the application.properties which has configurations for ActiveMQ. Here we are configuring the tcp broker url along with the username and password required to make ActiveMQ connection.
vim application.properties
spring.activemq.broker-url=tcp://${mqtt_server_ip}:61616
//Listener.java
@Component
public class Listener {
@JmsListener(destination = "t")// dusun Gateway uplink topic name
public String receiveMessage(final Message jsonMessage) throws JMSException {
String messageData = null;
System.out.println("Received message " + jsonMessage);
String response = null;
if(jsonMessage instanceof TextMessage) {
TextMessage textMessage = (TextMessage)jsonMessage;
messageData = textMessage.getText();
Map map = new Gson().fromJson(message, Map.class);
response  = "Hello " + map.get("name");
}
return response;
}

}
1) JMS Producer
Spring boot provides a very convenient way to send message to a destined queue.Since the introduction of @SendTo annotation, it only requires the queue name in the parameter to send messages.Annotating any method with @SendTo annotation ensures the returning object of the method will be pushed to the queue.
2) Working with JMS Topic
Spring boot provides above-discussed default behaviors to work with the messaging queue. But to deal with the topic in Spring JMS, we require to manually tell spring to enable it. For this, we only require to set the boolean flag i.e. pubSubDomain to true. To do this, we require our JMSConfig.java and set pubSubDomain to true for the bean definition of JmsTemplate and DefaultJmsListenerContainerFactory. Following are the changes we require to do.
template.setPubSubDomain(true);
factory.setPubSubDomain(true);
Once this is done, the rest of the configuration remains the same and in place of listening from a queue, our application can start listening from the topic and publish a message to a topic. Following are the lines I have added to consume message from a topic in Listener.java.
@JmsListener(destination = "t")
@SendTo("t/${dev_mac}")
public String receiveMessageFromTopic(final Message jsonMessage) throws JMSException {
String messageData = null;
System.out.println("Received message " + jsonMessage);
String ctrlMsg = parse(messageData);// todo your logic
return ctrlMsg;  // the json Msg  will send to dusun GateWay
}
 //Application.java
package com.devglan.tiles;
import org.springframework.boot.SpringApplication;
import org.springframework.boot.autoconfigure.SpringBootApplication;
import org.springframework.jms.annotation.EnableJms;
@SpringBootApplication
@EnableJms
public class Application {
    public static void main(String[] args) {
        SpringApplication.run(Application.class, args);
    }

    }
you can run the application using ./mvnw spring-boot: run. Or you can build the JAR file with ./mvnw clean package.
Then you can run the JAR file: java -jar build/libs/mqttproject.jar
Thank for your reading!


