


LoRa network is the current buzz in the wide area connectivity, for its extensive long-range coverage at low power cost. This feature makes it terrific for usage in the Internet of Things gateway. While you can get these services from public networks, a private LoRa network is also a great option.
In this article, you will learn what a private LoRa network is, how it works, how to build it, its benefits, and more.
What Is a Private LoRaWAN Network and How Does It Work?
Public LoRaWAN is a network service offered by telecom vendors and is designed for many users. In contrast, the private LoRanWAN is a closed network for individual users. This means autonomy on the overall network installation; gateways, devices, network servers connection, and applications.
As a stand-alone network, LoRaWAN can function without receiving internet feeds from the main telecom providers. And that is how with independent LoRaWAN gateways, users can tap into the network nodes to make the communication process a success.
 1")
The function of the LoRaWAN gateways is to concentrate the interconnected nodes by means of the LoRa network. The gateways can be installed either indoors or outdoors as desired. Either way, place them in a high position to guarantee better signals.
The next key component is the network servers. Network servers have a wide range of functionality in controlling the accessories in the communication infrastructure. These range from controlling gateways, actuators, and nodes, and maintaining data interference from other networks.
The LoRaWAN network server can be simple, or complex with a gateway sometimes playing the role of a server in small networks. Relaying data between nodes and gateways happens over the LoRaWAN protocol. Although, this can change to other forms such as MQTT, web socket, and web services.
LoRa vs LoRaWAN
Often the terms “LoRa” and “LoRaWAN” are sometimes used interchangeably. However, the two terms do not entirely have the same meaning. LoRa, or “Long Range” is the communication technology that actualizes Peer-to-Peer sharing of data over long distances.
On the other hand, LoRaWAN is the communication convention powered by LoRa technology, enabling interconnection with an array of base stations, making communication between IoT possible.
In other words, LoRa is one of the long-range technologies for remote connectivity between two objects. LoRaWAN is the guideline for actualizing the connection within LoRa technology.
What Are the Benefits of a Private Lorawan Network?
Private LoRaWAN services have unique advantages when compared with public networks. Take a look at a few below.
Low Cost
The cost of setting up private LoRaWAN is cheaper compared to the public network. With a public network, all operational costs are eventually passed on to the end user as pricing plans.
However, in designing your own network, you can cut down on most of these expenses by including only costs that suit your network needs.
Reliable
The system is not as complex as the public network. Therefore monitoring and debugging are easy. Additionally, in the public network, there are many more components, interactions, and collaborations. This may slow down reliability.
Secure
The aspect of being non-shared makes Private LoRaWAN more secure than the public one. Like with WIFI, Public LoRaWAN may create data leakages due to the various interactions with other users. Private networks on the contrary are exclusively managed within a closed network.
Low Power Usage
In general, both public and private networks are designed for low power consumption. But with a private network, it is possible to cut even more power usage by improving on the network architecture customization, as the network is less complex.
Useful in Places With No Public LoRa Network
Since not every location is covered by the public LoRaWAN, private networks can fill in that gap. This eases sharing of data without geographical restrictions.
Versatility
With a private network, there is lots of flexibility. You can customize the network to suit your particular needs. From device installations, and traffic control you’ve complete autonomy over the network.
Is LoRa Network Legal?
LoRa technology is based on ISM(Industrial Scientific and Medical) technology. This is a free radio frequency spectrum with no legal restriction on its usage. This means you can remotely share data between devices via sensors and apps. However, there is a restriction on the level of usage.
Process of Building Private Lora Wan Network
 2")
LoRa Networks
A LoRa network is made of five components:
- LoRaWAN Gateway
- Devices
- Firmware
- Network service
- Application
The five make up the hardware and the software required for building the LoRa network. We will take a deeper dive into each of the components below.
Selecting the LoRaWAN Gateway
The function of the LoRa WAN gateway is to search the spectrum for data signals and capture them for onward transmission to data servers. Devices and The Lora Network Servers are connected by gateways. Devices connect to the Gateway using low power networks like LoRaWAN, whereas Gateways speak with the Network Server using higher bandwidth communication protocols like cellular.
Guideline: how to set up LoRaWAN network servers?
Remember, there is no data specificity and any gateway within the range can capture the data package. The network service strips the data of duplicate content if the same data is received on several gateways. The data is then decoded, adaptive-rated, and transmitted to the app.
When it comes to LoRaWAN gateway selection, there are many options in the market. Types of LoRaWAN gateway can be divided into indoor and outdoor.
Indoor LoRaWAN gateways offer coverage similar to that of basements or buildings with numerous levels. These gates are able to enter deeply into interior areas like buildings.
Outdoor LoRaWAN gateways typically offer a significantly larger coverage area. These gates, which are appropriate for both urban and rural locations, can be put on cellular towers, rooftops, and metal pipes.
Further read: Indoor vs Outdoor LoRaWAN Gateway
But for this project, we will be referring to the three gateways below.
Kerlink Wirnet Station. This option is a bit pricey although it is more reputable in terms of signal quality and range.
MultiTech conduit. It is terrific for small installations. Plus, it is quite cheap, though for best results be sure to install a quality antenna.
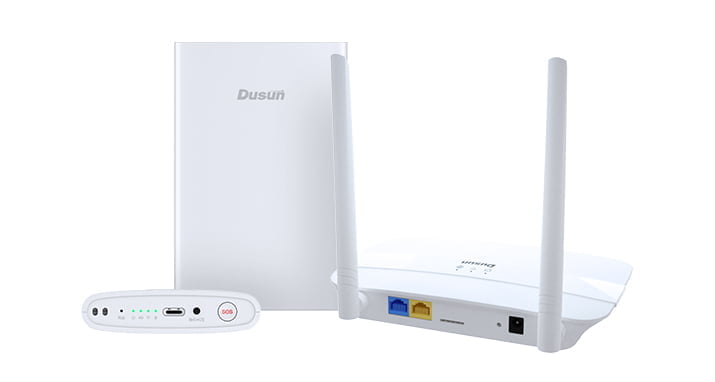
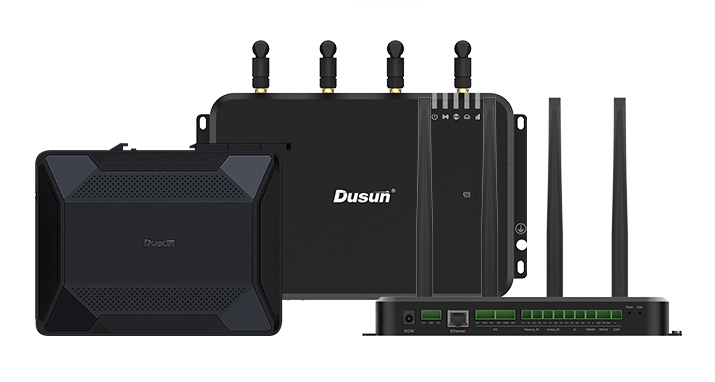
Build your own LoRaWAN gateway. Also, custom-designing your own LoRaWAN gateway is a fantastic option. Use Dusun IoT’s System on Module and LoRa Modules to whip out your own gateway at a fraction of the cost.
 3")
Raspberry Pi and IMST iC880A gateway
In our experience, one LoRaWAN gateway will suffice at the development stage. Once you reach the production stage, you may need at least two gateways to enhance signal quality.
Explore: IoT hardware development
Building a Device
The next step is to build a device. ARM Mbed OS is a terrific option for building a device. With this OS there are several options to which this tutorial can apply. The following are great examples.
MultiTech mDot and EVK board
SX1276MB1xAS and Mbed-based microcontroller.
You are all set to build your device now. One thing though; be careful when ordering hardware. The suitability of different models varies with geographical location. For Europe and US, look for models 868MHz and 915MHz frequencies designations respectively.
Network Server
The choice of the network server is critical as not every server will be able to interpret the LoRa data signals. Here, you can opt to build your own, or leverage vendors offering the server-building service.
LORIOT is one great example based out of Switzerland. The company has several cost-effective plans including Start, Build and Grow plans. Start the entry-level plan offers the basic features for small deployments and development stages.
For a more serious solution, you will need other options. Remarkably, LORIOT allows for ways to transfer data from their servers to the cloud or device via a web socket or TCP socket.
Other LoRaWAN network server options including:
Chirpstack Gateway using chirpstack lorawan network server
AWS LoRaWAN gateway using AWS IoT Core
How to Set up the LoRaWAN Gateway
In this stage, we will demonstrate how to install software on the different LoRaWAN gateways to capture the LoRa data packets and relay them to the LORIOT server.
Raspberry Pi and IMST iC880A
Using this method you can build your own LoRa Celluar gateway using Raspberry and IMST iC880A. All you need is to follow the steps outlined here, and have your gateway up and running in no time.
Kerlink IoT Station
To connect the gateway log into the Loriot Portal, and click to add the Kerlink IoT station. Next, add the MAC address(the MAC address appears prominently under the Kerlink device). You can then click “register” to register the device.
Once registered, configuring the Kerlink gateway is easy. Kerlink gateways come configured with “Zero Touch Configuration”. This means after registering the configuration will automatically be downloaded and installed. However, this is done on request to the vendors.
After the “Zero Touch Configuration” process the gateway will start and restart several times. This is normal, to establish the connection which can take anything from a few minutes to hours.
MultiTech Conduit
MultiTech is designed for configuring when DHCP is disabled. So to start off we have to disable it through, either of the two options below.
Connect Over Ethernet
First, connect the MultiTech conduit over the ethernet. Next, set a static IP address 192.168.2.2 and 192.168.2.1 for your computer, and your router respectively. Finally, log in as a root user. That is, input both your username and password as root.
Using Micro-USB
This method works by connecting the MultiTech conduit to your computer with a micro USB cable, the appearance of which is a serial device. Also, you can use PuTTy, software to log in.
Setting up the MultiTech conduit gateway
In this step we need to enable the DHCP, then connect the conduit to your router via ethernet. Then, find the IP address as we did in the “Kerlink IoT station” above, and log in.
Connecting LORIOT Software
With the gateway set, it’s time to connect them with the LORIOT servers which act as the repository of LoRa packets.
Log in to your LORIOT account and go to the dashboard.
 4")
On the dashboard scroll down to the gateway registration section and click the link to register a new gateway.
 5")
Next, you need to follow the prompts to register the gateway with LORIOT. Then you’re redirected to the gateway page, with the platform LORIOT binary and the documentation setup link.
You can copy the binary from the computer. Once successfully installed, it will appear as connected on the LORIOT gateway page.
 6")
Successful gateway registration
Creating a Device
At this stage, we will build a device to collect and send data over the LoRa network. The types of devices to build will depend on what data you intend to capture.
For example, you might want to create a simple moisture or motion sensor. Building a motion sensor with a PIR sensor will only cost a few bucks.
 7")
PIR Sensor connected to Nordic semiconductor and LoRa Shield
Expert Tips on Writing Firmware
Granted, LoRa use is unlicensed, there are limitations on the frequency of sending data. This varies with the location so you need to keep abreast with your geographical requirements to avoid data transmission failure.
Also note, some LoRa shields can block pins. However, you can solder new headers on the back of the shield to increase peripherals or use microcontrollers such as nRF51-DK with more pins.
Registering the Device on LORIOT
The encryption to LoRaWAN is an end-to-end type using two sets of session keys; the network server key and the device server key. We will have to integrate these keys, and the device Id, into the device firmware. Also, the keys are essential for the verification of the network server.
In your LORIOT account dashboard, click and follow this path; Applications>sample App> manage Output>Generate New Device. If you follow the process accurately, you will add the device to the list. Next, click device which will take you to the device page. On this page, set seqno checking to relaxed. The device is now registered.
Importing the Application
It’s now time to sign up for a Mbed account to use its Arm Mbed Online Compiler, which is all you need to build an application.
After signing up here is what to do next:
Go to the development board, on the board’s page. Click to add to your Mbed compiler. Next head over to LoRaWAN-Imic-App. Click, and import this program.
That step takes you to an online compiler where you can name your program
 8")
Importing a program.
Be sure to pick the right board: Nordic nRF51-DK, as shown in the default
Setting the Shield Frequency
Now we need to align the frequency with the shield model and your geographical location. Locate this file, LMiC/1mic.h in the compiler and open it to find the following lines uncommented.
 9")
Inserting the LORIOT Keys
In this step, we will add the keys from LORIOT to the device firmware. In the online compiler, open main.cpp and edit the following lines.
 10")
Adjust LOWARAN_DEV_ADDR to big endian DevAddr from LORIOT
Adjust NwkSKey and ArtSKey to the NWKSKEY and APPSKEY from LORIOT. Also, turn them into hexadecimal numbers.
Set Up Verification
Here we will verify whether we did it correctly. In the online compiler, click compile.
 11")
If the compilation is successful a file is downloaded to your computer. Next, connect your development board to your computer via USB and set it as a mass storage device. All you have to do now is to drag and drop the compiled file into the board, resulting in the booting of the device. That’s when messages start dripping into the LORIOT device page.
 12")
Manual Sending Option
While automatic sending is the default method, you can also opt for manual sending of the data, by removing some lines of code from main.cpp. Then you can replace it with a code that sends the message according to the condition you want it to.
For example, you can set it to only send a message when there are motion changes in the PIR sensor, instead of continuous sending.
The MultiTech mDot Option
Importing the Application
Import the program into the online compiler by following these steps:
Sign up for an account on ARM Mbed>Navigate to multiTech mDot Page>lick add to your Mbed compiler>MDot personalized activation page>Click import this program
The last step lands you on the compiler where you can name the program.
 13")
Inserting the LORIOT Keys
Let’s now add the keys to the device firmware from LORIOT servers.
On main.cpp, copy the big endian DevAddr, APSKEY, and NWKSKEY into the app from LORIOT.
 14")
Verifying Set Up
In the online compiler click compile. If we’ve been on the right track, a file should be downloaded to our computer.
Next, connect your development board as a mass storage device, using a USB cable. You can now drag and drop the downloaded file on the board. As a result, the device boots up as the data starts streaming in from the LORIOT device page.
Manual Sending Option
As with the LoRa shield, the automatic sending of data is the default position. However, you can change this by replacing send_data(); code script with another line to enhance manual sending. Refer to the section on the LoRa shield for inspiration.
Creating a Web Application
We will now build an application to use the data generated by the sensor. In this, we opt to draw the data from LORIOT servers via web sockets. In our web app, we will set up the colors red and green to indicate the detection of motion and no motion respectively.
Next head over to the LORIOT dashboard and follow the following process: Application>sample App>Output.
Set the output type to Websocket
 15")
Icreating a web application
On this page copy the URL and the token under the current output setup and paste it into a code sample like the one below.
 16")
Final Thoughts
That’s it! We’ve gone through all the steps required to successfully create a practical, and robust private LoRa network to capture and transmit data. If you’ve been hesitating to build your LoRa network, do not hold back anymore. I hope this article inspires you on your journey to successfully building a LoRa network to connect your things.