A BLE gateway is an IoT gateway device integrating a Bluetooth communication module and a network communication module (such as Ethernet, wireless LAN, 4G cellular network, etc.), and is used to collect information sent by Bluetooth devices and upload them to the network server.
Bluetooth Low Energy gateway has four main functions: Bluetooth scanning, connection, Bluetooth data transfer and indoor positioning. Bluetooth gateway devices can be widely used in such places as schools, shopping malls, factories, nursing homes, exhibition halls, tourist attractions, airports, etc., to help personnel or asset positioning, sensor data collection, etc.
If you buy Bluetooth gateway for your IoT projects and solutions, how do you plan to configure Bluetooth gateway to make it talk with your BLE devices? This article is going to give you a Bluetooth gateway configuration guideline. You may purchase other brand bluetooth gateway, and that’s alright. This guideline just aims to give you some ideas and inspiration.
Get to Know System Block Diagram and Choose OS for Bluetooth Gateway
Here Dusun IoT recommends you to use Linux system to implement an application over Bluez stack to talk with BLE devices.
As depicted in figure 1, Linux supports the BLE protocol by running the Bluez stack. BlueZ provides support for the core Bluetooth layers and protocols. It is flexible, efficient and uses a modular implementation. The BlueZ stack supports all core Bluetooth protocols and layers now. Users can write BLE applications using Bluez APIs to manipulate BLE devices.

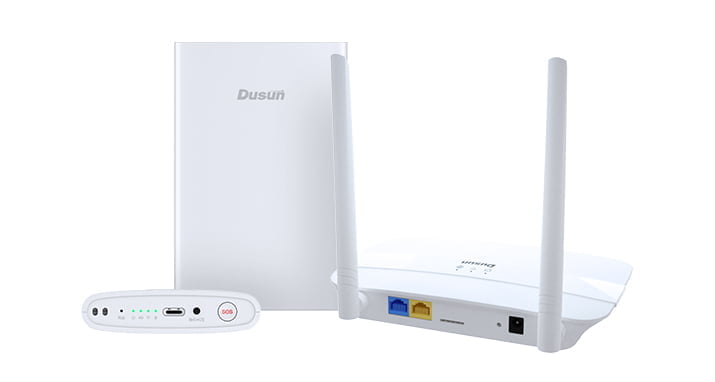
Dusun Bluetooth gateways run the Linux OpenWrt system. Bluetooth Low Energy (BLE) is intended to provide considerably reduced power consumption and cost while maintaining a similar communication range with Bluetooth. BLE is suitable for a lot of IoT applications. Many operating systems support BLE and thus BLE is very popular.
The Dusun IoT gateways support most connectivity protocols including BLE(4.x/5.0/Mesh), ZigBee 1.2/3.0, Z-Wave, TCP/UDP, etc. Users can connect the gateway with various BLE devices.
Dusun Bluetooth Gateway Feature
System
- OS: Linux@ OpenWrt
- Processor: MTK7620A (MIPS24KEc(580MHZ))
- RAM: 128MB
- Flash: 64MB
Wireless Protocol
- LTE-M1
- Bluetooth Low Energy
- Wi-Fi
- Zigbee3.0
- Z-Wave
Ethernet
- WLAN
- LAN
Bluetooth Gateway System Configuration Steps (Take Dusun Bluetooth Gateway as an Example)

Figure 2. gateway→PC connection diagram
The IoT BLE gateway can be configured following these steps:
- Connect the Bluetooth gateway to the PC and power up, according to figure 2;
- Open a web browser on PC, input Gateway IP Address: 192.168.66.1. Enter the username and Password (Username: root Password: root),and then login to the gateway;

3) Make system configuration at the system menu, the timezone, password and others can be revised here;

4) Configure the network at the network sub-memu;


5) When the configuration is completed please reboot the gateway; Then users can log in the Bluetooth gateway by inputting the following commands in a terminal, and then input your password. IP_addr is the IP address which user-configured above. The default IP is 192.168.66.1. The below figure shows the login scene. You can successfuly login into the Bluetooth gateway through ssh root@IP_addr

Connecting a BLE Sensor with Bluetoothctl (Take Dusun Bluetooth Gateway as an Example)
The Dusun Bluetooth gateway is installed Bluez version v5.50. Bluez has provided many command utilities for controlling BLE devices. Bluetoothctl is the main command for configuring Bluetooth devices on Linux. Users can use this utility to know more about their BLE devices and are familiar with the connecting steps.
An pulse oximeter BLE sensor is used for living example. The steps for connecting and managing the pulse oximeter BLE sensor is shown below:
1) Open Bluetoothctl and scan Bluetooth devices to find the pulse oximeter sensor(whose name is my oximeter);

2) Pair the sensor and connect it;


After these steps, the user can know something about the sensor and its BLE profiles which can also be seen from the sensor user manual.
How to Program by Using Bluez Dbus APIs to Get the Sensor Data
A sample: communicate with an pulse oximeter BLE sensor using Bluez.
We have provided a sample application to get the BLE pulse oximeter sensor data.They include the Bluez Dbus library, and several c program files. The pulse oximeter sensor operating functions is contained in the Oximeter.c. The main function in the main.c is shown as below.
int main(int argc, char *argv[])

{

GError *error = NULL;

GDBusClient *client;


INIT_LOG("HL");

/*init global data for bluez operation*/

init_global_data();

init_curl();

/*register the drivers you have written*/

load_healt_drivers();

  /*create a main loop object*/

main_loop = g_main_loop_new(NULL, FALSE);

/*set up the dbus connection*/

dbus_conn = g_dbus_setup_bus(DBUS_BUS_SYSTEM, NULL, NULL);


/*create a bluez client for dbus connection object*/

client = g_dbus_client_new(dbus_conn, "org.bluez", "/org/bluez");

  /* set connect/disconnect/signal handler function*/

g_dbus_client_set_connect_watch(client, connect_handler, NULL);

g_dbus_client_set_disconnect_watch(client, disconnect_handler, NULL);

g_dbus_client_set_signal_watch(client, message_handler, NULL);

  /* set proxy handlers*/

g_dbus_client_set_proxy_handlers(client, proxy_added, proxy_removed,

property_changed, NULL);

  /* set ready */

g_dbus_client_set_ready_watch(client, client_ready,  NULL);

  /*running in a loop*/

g_main_loop_run(main_loop);


  /*release the resources*/

g_dbus_client_unref(client);

dbus_connection_unref(dbus_conn);

g_main_loop_unref(main_loop);

return 0;

}
Users should note the function load_healt_drivers();, in which the function register_health_driver(&Oximeter_driver) is invoked to register the callback functions which process the upcoming events and then get the data the sensor reported. The UUID_Oximeter_SERVICE is the primary service that its characteristic can be read to get oximeter values.
The HealthDriver and BluetoothDeviceCallbacks is defined as
typedef struct HealthDriver_

{

char * name;

char * service_uuid;

struct BluetoothDeviceCallbacks_ * callbacks;

}HealthDriver;

typedef struct BluetoothDeviceCallbacks_

{

void (*init) (BluetoothDevice * btdev);

void (*exit) (BluetoothDevice * btdev);

void (*scan_found)(BluetoothDevice * btdev);

void (*connect_state_changed) (BluetoothDevice * btdev, bool connected);

void (*service_added) (BluetoothDevice * btdev, GattService * service);

void (*characteristics_added) (BluetoothDevice * btdev, GattCharacteristic * characteristics);

void (*characteristics_notify)(BluetoothDevice * btdev, GattCharacteristic * characteristics,

 const unsigned char * value, int len);

//void (*property_changed)();

}  BluetoothDeviceCallbacks;
In Oximeter.c a BluetoothDeviceCallbacks instance and a HealthDriver instance are defined:
static BluetoothDeviceCallbacks Oximeter_callbacks =

{

.init = Oximeter_init,

.connect_state_changed = Oximeter _connect_state_changed,

.scan_found = Oximeter _scan_found ,

.characteristics_added = Oximeter_characteristics_added,

.characteristics_notify = Oximeter_characteristics_notify,

};

#define UUID_Oximeter_SERVICE  "cdeacb80-5235-4c07-8846-93a37ee6b86d"

HealthDriver   Oximeter_driver =

{

.name = " Oximeter detector",

  .service_uuid =  UUID_ Oximeter_SERVICE,

  .callbacks = &Oximeter _callbacks,

};
Oximeter_init,Oximeter_connect_state_changed,Oximeter_scan_found, Oximeter_characteristics_added, Oximeter_characteristics_notify are functions to process connection events when the sensor is connected to the gateway. Oximeter_characteristics_notify process the data notified. Users should write their own callback functions according to their sensor characteristics to control the sensor.
1) Get the Openwork toolchain and copy it to a Linux PC
Get the cross compile OpenWrt-Toolchain from Dusun, whose name is openwrt-sdk-ramips-mt7620_gcc-4.8-linaro_uClibc-0.9.33.2. Linux-x86_64.tar.bz2. Decompress the downloaded OpenWrt Toolchain to a local folder (E.g.: home/software/OpenWrt-SDK).
2) Compiled the attached code files
Copy the above code file to the Linux PC and decompress it to a folder (E.g.: home/software/test). Open ./BLEsample/example/ folder, and edit the Makefile file to revise the CROSSTOOLDIR to the OpenWrt toolchain directory you created above. This is depicted in Figure 3.


Then open a terminal on the Linux PC, and type the following commands:
cd BLEsample; sudo make
Finally, the test bin file which can be run in the gateway has been compiled. (Figure 4).
3) Copy the compiled test bin file into the gateway and run it
There are some ways one can do it. Under Linux PC, you can use SCP command (scp local_file remote_username @remote_ip:remote_folder) to do it.
Make sure the gateway is connected to the same router with PC, then run the following commands:
scp test [email protected]:/root

Then remote login to the Bluetooth gateway using SSH commands or SSH client (windows: putty or SecureCrt) and run the copied bin file. The login password can be revised following the configuration steps in the above sections. Finally, we power up the oximeter device and run the test file, we can see the data the oximeter notified to the program as figure 5 shows. The data can be analyzed according to its manual. Figure 6/7 shows the sensor and Bluetooth gateway for testing respectively.