Home Assistant is an open-source and free software for Home automation designed to be a central control system for smart home devices with an emphasis on local control and privacy. You can access the home assistant through a web-based user interface by utilizing voice commands via a supported virtual assistant like Alexa or Google Assistant or by using companion apps for Android and iOS.
This guide will explain how you can improve your home assistant safety. Let’s get started.
Why is it important to secure my home assistant instance?
Well, this question is an obvious one. If someone has a connection to your Home Assistant instance, that person can alter your cooling/heating settings (higher risk) or control your lights (annoyance/low risk), or, based on your instance setup, unlock home doors or open a garage door(high risk). In addition, with some of the add-ons and the option to use Ingress, someone could access the configuration files of your home assistant or shell access and, in essence, your entire network. Since the home assistant requires the storage of several passwords or other security keys to collaborate with other services, you could easily expose several of your passwords.
Aside from the obvious risk of opening a door or freezing your home, access to information is more important to someone with an evil intention and not in your local community. If you practice proper password hygiene, accessing your home assistant’s secrets/passwords can allow a good person to access several accounts and enable them to take charge of accessing important accounts. In addition, with complete network access, introducing ransomware would be easy, and your information would be under lock and key until you pay to get it back.
What are the Basics of securing home assistant instances?
Let’s now look at the basics of securing your home assistant instance.
Passwords
Home Assistant will require a password during the installation process. Endeavor to practice proper password hygiene. Using unique and strong passwords goes for every user accessing your home assistant instance. You are only as safe as your weakest password.
Multi-Factor Authentication (MFA)
Suppose your password or another user on your home assistant instance has a compromised or weak password; MFA will provide an added layer of security to prevent a bad actor from accessing your home assistant instance. You can find the Home assistant docs on setting up MFA here. Use the same controls for passwords with the MFA. Again, the strength of your weakest link determines your security.
Visibility / User Access
Changing admin rights and restricting views currently need to provide more added security. Placing limits on views is extra security through obscurity, but it would do no harm.
User Levels
Home Assistant offers three user account levels: Admin, general user, and owner. As earlier stated, this feature currently doesn’t provide any extra security, but it’s only proper to set up. If a user isn’t required to be an admin, take down that privilege by Navigating to their user account page and selecting the toggle for admin to deactivate.
View Access
Anyone who fully understands the home assistant can bypass this aspect effortlessly. However, making changes to the visibility will stop a non-specialist. This feature restricts what a particular user can see and enables you to limit the visibility of certain views on your Home assistant to only people who require them.
Restrict Access Attempts
Typically, Home Assistant will allow someone to bang on the conventional front door until they get tired or obtain access. Fruitless login attempts are recorded on the Home Assistant front end through persistent notifications. However, if you regularly check your instance, someone could be trying to access it for a long period before getting noticed.
IP filtering and banning
By setting up the IP filtering and banning tool in Home Assistant, you can block anyone from making further attempts after several failed login attempts. However, ensure you have another means of entry; suppose you mistakenly ban yourself via this method. You’ll need to gain entry to the Home Assistant from a different IP address or alter the “ip_bans. yaml’ file and restart to eliminate the restriction.
Get Notified of Failed Login Attempts
Like I said earlier, Home Assistant, by default, shows failed login attempts as a persistent notification on the front end. I prefer when these notifications are directly sent to me to enlighten me that they are happening in real-time. Add the following automation to your instance to receive real-time notifications of failed login attempts and remote the persistent notification.
- alias: "Send notification upon failed login attempt"

  id: 04e7a1c2-5c61-47d7-9731-afa883742c09

  trigger:

    - platform: state

      entity_id: persistent_notification.http_login

  condition:

    - condition: template

      value_template: "{{ trigger.to_state.state != 'None' }}"

  action:

    - service: notify.home_assistant

      data_template:

        title: "{{ states.persistent_notification.http_login.attributes.message }}"

        message: 'url: https://whatismyipaddress.com/ip/{{ states.persistent_notification.http_login.attributes.message.split ("from ") [1]}}'

    - service: persistent_notification.dismiss

      data:

        notification_id: "http_login"
Hosting Files
This aspect is well treated in the Home Assistant HTTP docs but often ignored, and I’ve seen several people post about it on forums as an issue when they discover it. You can see files in your main configuration directory in the www folder. Someone with an internet connection can view these files without logging in. Do not transfer anything into this www folder you wouldn’t want anyone to see.
Avoid Exposing Personal Information
When setting up the name/location of your Home Assistant instance, do not include any personal information that anyone can identify. Furthermore, don’t use any identifiable personal data for your domain name.
Ensure Everything is Updated
Keep your Home Assistant, Add-ons, operating system, Home Assistant gateway and everything associated with your instance or network up to date. Several security vulnerabilities are found on various devices daily, and an equivalent number of fixes are rolled out regularly.
From what I know, there have been only two direct Home Assistant security vulnerabilities ( these have long been sorted out). Moreover, Home Assistant utilizes several other sources of packages/code, etc., which are also updated and may be covering a security hole. Ensure they are all updated, and you’ll have the current fixes for any security problems. In addition, check your modem/router/firewall ( a box that provides you with an internet connection) for updates.
How do I secure my Home Assistant Instance (Remote Access)
Let’s now see how you can ensure your Home Assistant’s safety. But before we get started, let’s briefly touch on DuckDNS.
What is DuckDNS?
DuckDNS is a service that converts an IP address difficult to remember, for example, 95.214.17.132, into a simpler alternative like quackquack.duckdns.org. If correctly set up, it can be automatically updated always to send quackquack.duckdns.org to your Home Assistant instance, even when there’s a change in your IP address. It’s important to understand that DuckDNS and other dynamic DNS providers do not add any form of security.
Port Opening/Forwarding
To permit access from outside your home network, you forward a port and inform your firewall/router to forward whoever knocks on that door to any place you prescribe within your network. You can see this action as equivalent to leaving an open door/window in your house so anybody can enter. Typically, port 443 or 8123 is forwarded to your Home Assistant instance. This transfer directs anyone outside your network that specifies your IP address or domain and the correct port to your Home Assistant instance.
Port 443 is the default port of the encrypted HTTPS traffic. Several internet browsers default to HTTPS and port 443 whenever you fill in an IP address or web address. It would be best if you only opened the ports you have to, and using a less common port will cut down the amount of traffic the open port sees. As mentioned earlier, port 443 is an HTTPS traffic default, and it’s scanned heavily. For example, choosing an uncommon port above 20K doesn’t provide security. This action considerably reduces attempts and log noises. It makes seeing the things of concern much simpler.
Home Assistant Traffic Encryption
If you’re trying to gain access to any site or your Home Assistant instance without traffic encryption, everything is visible in plain text for anyone with access to see. Any character you enter into the web browser, say a password, for example, is sent in plain text and anybody can read/view it.
You can use the DuckDNS add-on to encrypt your traffic. It is a commonly used method, free and easy to set up. You can install the DuckDNS add-on by navigating to the supervisor page and, afterward, the add-on store. The procedure for configuring the add-on and your Home Assistant instance to encrypt the traffic is available for each add-on configuration page. Check out this video here to see how things are set up.
Using a VPN
A Virtual Private Network is your private route back into your home network from any location with an internet connection. The VPN is an alternative to opening a port, and you can use it without needing another encryption setup, as all the VPN traffic is encrypted. Let’s see some examples of secure and relatively simple to-set-up VPNs that are available as add-ons below :
- Tail Scale
- Wireguard
- Zero Tier One
How often do I run security checkups on my home assistant?
Running regular security checkups is very crucial for your Home Assistant Safety. Here are ways you can perform a security check on your Home Assistant Instance:
Check how the rest of the Internet sees you
- Using a public computer, try gaining access to your instance from a web browser, observe what happens, and check what the feedback looks like. Test your instance passwords ( if a connection goes through) and confirm you are receiving a failed login notification. Suppose you have a limit on wrong passwords; ensure you get shut out after exceeding the limit.
- Run periodic Shodan checks. Inspect your IP and domain, and search for results under “homeassistant,” ‘Home Assistant’ or any other keywords you can come up with to see if you show up.
- Use GRC’s Shields up to run the scans.
- Run a Nmap scan from a public IP ( you can perform this scan inside your network instead, using a public wi-fi).
What if Shodan, the Nmap scan, or the shields up test show an open port? Well, at this point, you should carefully consider two things. First, was it your intention to leave that port open? If it wasn’t, then the issue needs to be addressed. If you intended to leave it open and use the test as a confirmation, anyone worldwide could also see that port as long as they have an internet connection. Any service running on that port should be secure, as anybody can access it. Run tests on that security, and utilize strong passwords and two-factor authentication whenever feasible.
Confirm your security settings
Finally, endeavor to confirm your Home Assistant’s safety. You can go through this guide again to ensure everything is set up the way you want. We all make configurational changes at one point or the other. And sometimes, while making those changes, it skips our minds to apply the security rules we have in place. It’s only ideal for checking up on everything periodically. Is two-factor authentication set up for all users? Are the add-ons, operating system, and Home Assistant up to date? Are all user’s passwords still strong and not reused?
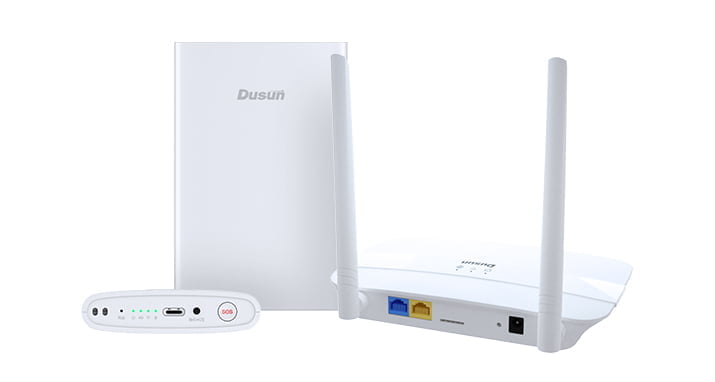
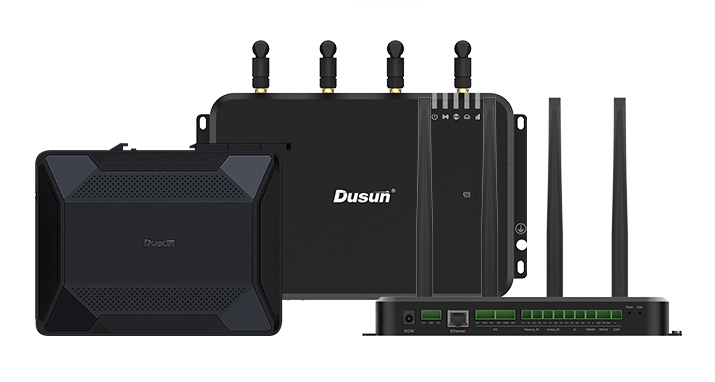
Dusun: Smart IoT Gateway Choice For Home Assistant
Dusun IoT seeks to empower developers, solution vendors, and enterprise customers to deploy smart home solutions quickly. DSGW-210 HA Z-Wave Gateway Home Assistant provide smart connections and ease of use. You don’t need to go through any configuration or programming. The Gateways are productized, direct to market, meaning only transplanting applications are required.

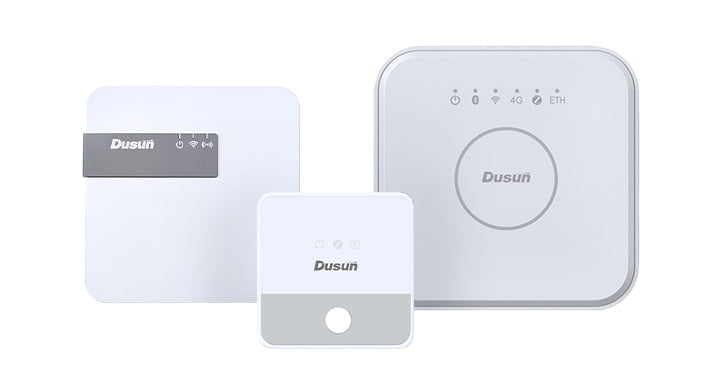
Each Wireless Module is designed in line with the Modular IoT design, and the gateway is customizable by removing irrelevant connectors and features to reduce cost. In addition, you can self-develop and supply your add-ons for DSGW-210 IoT gateway device to run without updating. All protocols, LTE CatM1, BLE mesh, and Wi-fi can each have an add-on developed based on various requirements.
You may also have interested in: