


When people think of building a smart home hub, the Raspberry Pi immediately comes to mind. On a personal, home-use basis, the Raspberry Pi has major advantages over the competition.
However, if you intend to build at scale, you might be better off with the alternatives. Let’s explore the process of building with a Raspberry Pi, its pros and cons, and whether you should consider Raspberry Pi alternatives, such as the Dusun Pi4.
Advantages of Raspberry Pi as a Smart Home Hub?
The reason why people use the Raspberry Pi to build your smart home hub comes down to a few main reasons:
- Affordability;
- Large community of users;
- Customizability
Read further: IoT home automation using Raspberry Pi
Affordability of Raspberry Pi Smart Home Hubs
For end-users who want to build a simple home automation system, the Raspberry Pi stands out because the investment is low. The basic list of parts that you will need:
- Raspberry Pi board
- microSD card
- Power supply
- Case (optional)
- Screen (optional)
- IoT modules if your devices don’t use WiFi and Bluetooth
All-in, you can expect a basic set-up to cost at least three figures, but a Raspberry Pi smart home hub allows users to delve into the world of smart home management without the burden of hefty investments in hardware or being locked into a proprietary system.
Large Raspberry Pi Smart Home Community
The Raspberry Pi’s widespread popularity has fostered a vast and active community. For an end-user without any professional support, you can only rely on the community when your setup isn’t working.
Since the Raspberry Pi has the widest user base, you will most likely be able to Google a solution to common problems, or reach out in the Raspberry Pi forums to find a solution. This community-driven ecosystem ensures that users have ample resources, guides, and forums at their disposal, should they encounter challenges or seek assistance.
The ease with which one can set up a Raspberry Pi home automation system, even without profound technical expertise, further cements its position as the go-to choice for many smart home enthusiasts.
Customizability
Instead of buying a ready-made solution that locks you in, the Raspberry Pi allows you to use different smart home operating systems and protocols.
You will be able to customize it based on your preferences and add or remove anything that you need or don’t need. This has implications on speed and privacy.
Read further: is Raspberry Pi an IoT gateway?
Setting up Your Raspberry Pi Smart Home Hub
The first decision you’ll have to make is the choice of smart home hub software. There are a lot of them out there but Home Assistant is one of the most popular smart home hub software for the Raspberry Pi. So, let’s see why.
Home Assistant has the ability to consolidate control of various IoT devices into a single platform, eliminating the need for multiple apps. This centralization not only simplifies the user experience but also enhances the efficiency of managing smart home devices.
Installation of Home Assistant
Assuming you are using the Raspberry Pi 3, 4 or 400, the fastest and easiest way to install Home Assistant is to use the Raspberry Pi Imager. You can download it here from Raspberry Pi.
Once it’s installed, you will need to image your SD. Open the program and:
- Click Choose OS
- Scroll to find Other specific-purpose OS > Home assistants and home automation > Home Assistant

Insert your SD card and choose your SD card in the “Storage” button. Then, click the “Write” button.
To set up your Raspberry Pi with Home Assistant, begin by inserting the SD card into the Raspberry Pi.
Once that’s done, connect it to the network using an Ethernet cable.
After ensuring the network connection, plug in the power supply to initiate the startup of the device.
Give it a few minutes, and then, on the browser of your desktop system, you can access your newly set up Home Assistant by navigating to “homeassistant.local:8123”.
If that doesn’t work, try http://X.X.X.X:8123` (replace X.X.X.X with your Raspberry Pi’s IP address) or homeassistant:8123.
Using Blueprints to Speed up Your Development
Blueprints in Home Assistant are pre-made automations that users can easily integrate into their Home Assistant instance. They serve as templates for automations, allowing users to add the same automation multiple times without having to recreate it from scratch each time.
You can find Blueprints here in Home Assistant’s Blueprints Exchange or you can create your own.
To create an automation using a blueprint
- Navigate to Settings > Automations & Scenes > Blueprints.
- Choose the desired blueprint and select “Create Automation”.
- This action opens the automation editor with the chosen blueprint.
- Assign a name to the automation and configure the blueprint as needed.
- Save the automation by clicking the “Save Automation” button.
Importing Blueprints

Home Assistant allows users to import blueprints from various sources, including the Home Assistant forums, GitHub, and GitHub gists.
To import a blueprint:
- Go to Settings > Automations & Scenes > Blueprints.
- Click on the “Import Blueprint” button.
- A dialog will appear prompting for the URL of the blueprint.
- After entering the URL, a preview of the blueprint will be displayed.
- Users can rename the blueprint if desired and then finalize the import.
- Once imported, the blueprint is available for creating automations.
Deploying Using Docker
If you plan to deploy the same software and configuration across multiple Raspberry Pi setups, you could just clone the SD card volume. Another way is to use Docker.
Running Home Assistant on Docker ensures that the software is isolated from the host system and from other containers that might be running on the same host system. This isolation can prevent potential conflicts and ensure that Home Assistant runs in a consistent environment.
In addition, Docker containers are portable. This means that Home Assistant and any content within the container can easily be replicated from one Raspberry Pi to another. When moved, the container environment remains completely intact, ensuring that the software behaves consistently across different systems.
Home Assistant’s docs have covered the installation process in Docker.
Why Have People Moved away from the Raspberry Pi?
Beginning in late 2021, Raspberry Pi started experiencing supply chain issues as semiconductors became increasingly difficult to come by. This led to shortages across the Raspberry Pi range, and led some to look for alternatives and rightly so.
Read about: Raspberry Pi shortage
Some businesses built their product around a Raspberry Pi and felt increasingly concerned at the shortages of their product.
The situation was grim. In a 2022 interview with Cambridge Tech Podcast, Raspberry Pi’s CEO Eben Upton mentioned that, “demand is very clearly increasing and yet the ability to supply is decreasing. That’s very painful for us.”
At the same time, a black market emerged where prices of rare boards like the Compute Modules and the Zero-series boards shot through the roof.

The graph above, from Amazon US price tracker Keepa, shows the spike of prices for Raspberry Pi 4 (4GB) in 2022.As a result, the term “Raspberry Pi Alternatives” became a keyword on Google.
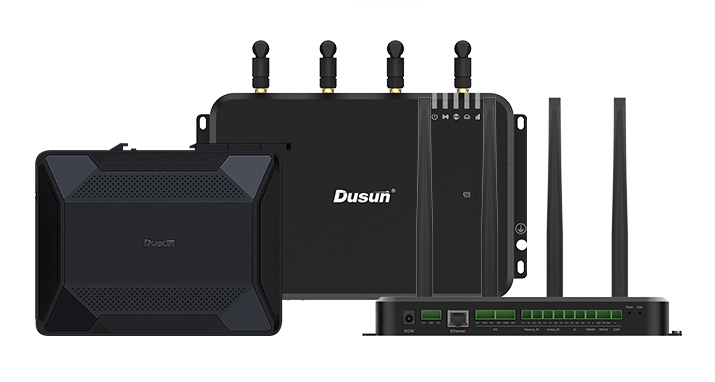
Introducing a Dynamic Smart Home Hub with a Reliable Supply Chain

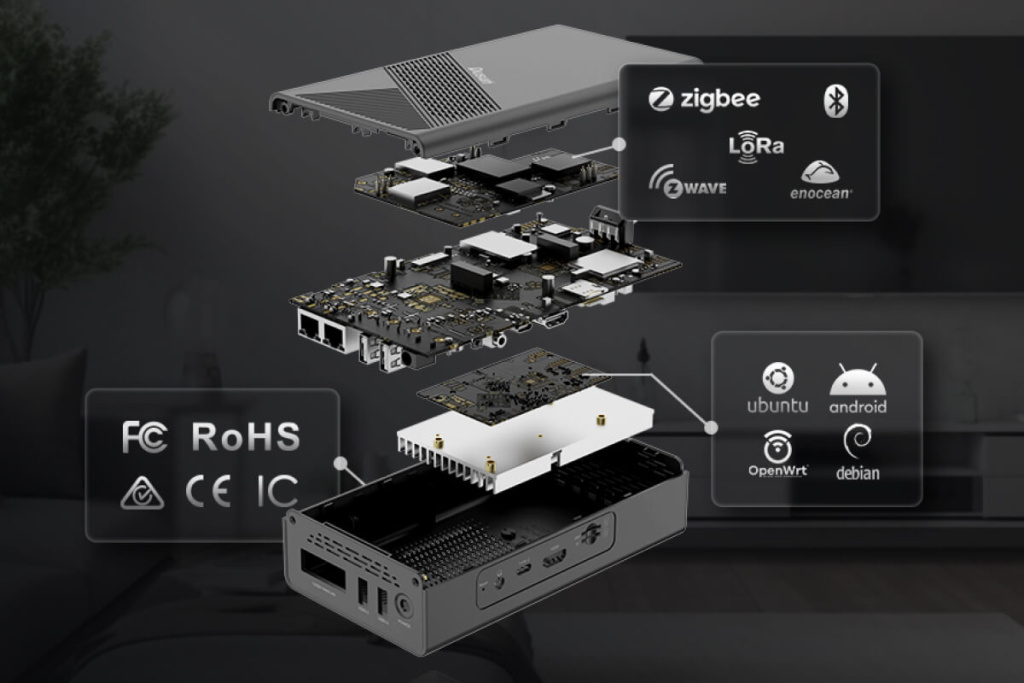
Dusun Pi4 specifications:
- Wireless Protocols Supported: Wi-Fi 2.4G/5G, Bluetooth 5.2, Zigbee 3.0, Z-Wave, Tuya-Zigbee, LTE Cat4, Sub-G.
- Processor: RK3568 Quad-core ARM Cortex-A55.
- GPU: ARM G52 2EE.
- Video Processor: Supports 4K VP9 and 4K 10bits H265/H264 video decoding.
- Operating System: Debian11.
- Memory: 4GB DDR4 RAM and 64GB eMMC storage.
- Power: DC 12V, with PoE support.
- Interfaces: Ethernet, SIM slot for 4G LTE Cat4, TF card slot, USB ports, HDMI 2.0, Audio port, PCIe2.1, and Debug serial port.
- Dimensions: 177.9mm x 100mm x 45mm.
- Weight: 590g.
Faced with these challenges, Dusun Pi4 is an alternative for businesses building IoT projects. Our Dusun Pi4 has a stable supply chain, affordable bulk pricing and support from our in-house experts.
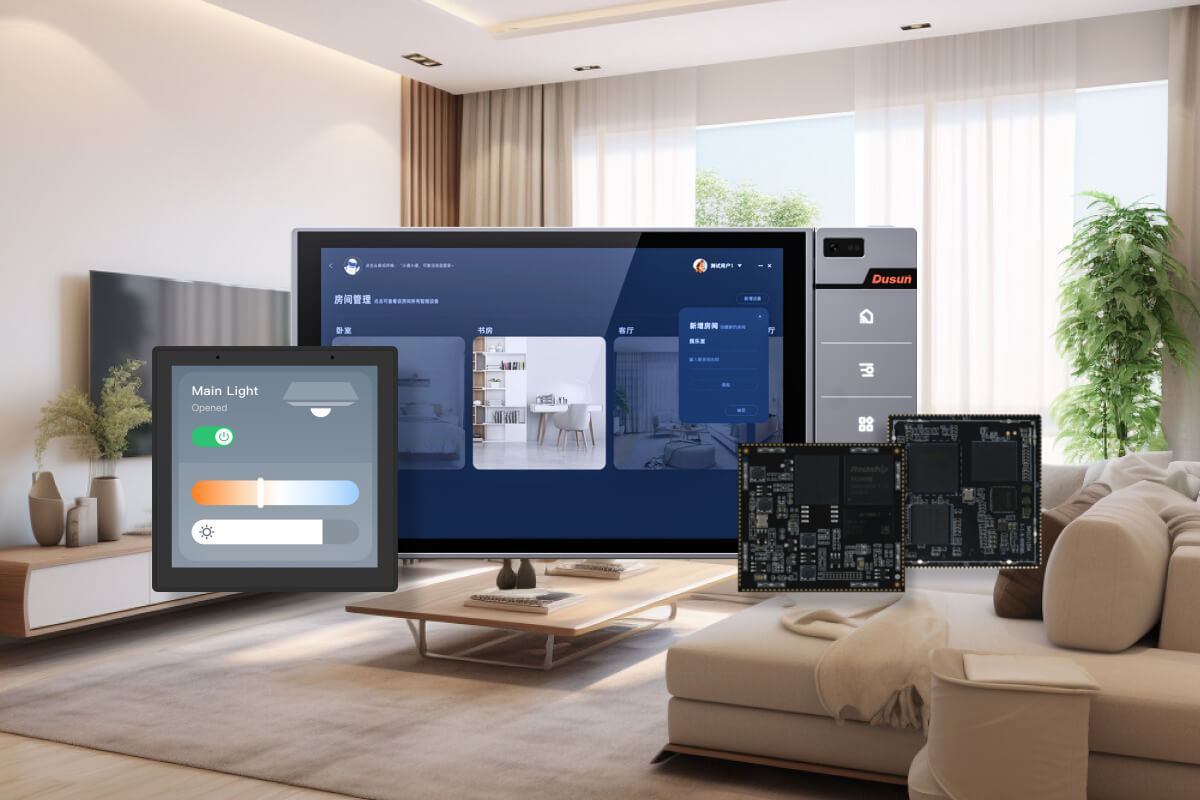
The Dusun Pi4 is an IoT gateway designed for developers. It is similar to the Raspberry Pi 4 but comes with built-in IoT wireless modules: Zigbee, Z-wave, Bluetooth, Wi-Fi, LTE, Tuya-Zigbee and Sub-G.
The device is powered by the Rockchip RK3568 processor, which is based on the ARM Quad-core Cortex-A55 core, with a 64-bit architecture and a clock speed of up to 2GHz. The Dusun Pi4 can run multiple systems including Linux, Debian, and Android.
If you are specifically building an IoT product and need the most efficient way to get to your goal, choosing the IoT-focused Dusun Pi4 could be more effective than a general-purpose Raspberry Pi.
- Integrated IoT modules
- Reliable eMMC storage
- Supply stability
- Professional engineering team ready to assist users
Integrated IoT Modules
The Raspberry Pi 4 is a general-purpose SBC, whereas the Dusun Pi4 is geared towards commercial IoT projects from the get go, hence saving time and reducing complexity.
Read further: what are wireless modules?
The Dusun Pi4 comes with built-in IoT wireless modules that support a variety of protocols. This means you won’t need to purchase and integrate additional modules for IoT connectivity.
eMMC Reliability
The Dusun Pi4 comes with an integrated 64GB eMMC storage which is reliable enough for industrial settings.
Unfortunately, if you bought a Raspberry Pi 4, you would have to use the microSD card as storage unless you wanted to further customize it to work with solid-state storage.
There’s also the Raspberry Pi Compute Modules which have integrated eMMC modules, but those boards have been the hardest to come by unless you have been accepted as a business customer.
Supply Stability
Dusun manages to supply products reliably because we have a factory where we assemble our products. We work with a Rockchip, who supplies the Rockchip RK3568 processor for a wide range of SBCs.
Professional Support
One major complaint that users of Raspberry Pi alternatives have involves the lack of support. Developing projects is so much more difficult when you have nobody on your side, which leads to people hitting the wall and abandoning projects.
If you want to go a step further, we can also offer development support. In this case, we will assign a programmer and project manager from our Field Application Engineer team to offer technical support.
Learn more about the Dusun Pi4
Our team is ready to help you develop your next product and you can contact us here.
Dusun IoT Product Release News:
References:
Cambridge Tech Podcast, Nov 20, 2022: https://www.cambridgetechpodcast.com/episodes/episode/782a8c1a/a-decade-of-insights-from-raspberry-pis-eben-upton
Raspberry Pi 4 Model B 4GB price graph: https://keepa.com/#!product/1-B07TC2BK1X
FAQs of Use Raspberry Pi as Smart Hub
What is the leading smart home hub software that most Raspberry Pi users prefer?
Most Raspberry Pi users prefer Home Assistant. It’s open-source, highly customizable, and offers compatibility with a vast range of devices.
Why should you use a Raspberry Pi as a smart home hub?
Using a Raspberry Pi as a smart home hub offers affordability, flexibility, and customization. It allows users to create tailored solutions, supports a wide range of devices, and, being open-source, provides room for community-driven enhancements. It’s an ideal choice for those seeking control and adaptability in their smart home setup.
What are the disadvantages of using a Raspberry Pi to create a smart home hub versus a pre-made kit?
Using a Raspberry Pi for a smart home hub can be more complex than a pre-made kit. It often requires DIY setup, programming knowledge, and manual integrations. Pre-made kits are usually more user-friendly, offer professional support, and can have better compatibility with a range of devices.